Thorlabs Liquid Crystal Analog FastZ
Thorlabs has developed a fastZ device which uses liquid crystal lenses to switch between 16 discrete focal planes quickly and without introducing vibrations that could disturb the focus or the specimen. It has been implemented in ScanImage with special considerations for which objective is being used and navigating with 16 discrete focal planes.
Hardware Configuration
The controller will have a female SMA input for analog control of the focal plane depth. Make sure this is connected to your DAQ and that the controller is powered and connected to the liquid crystal fastZ device.
Software Configuration
In ScanImage, open the Resource configuration window from the launch window or from the Main Controls window under File>Configuration.
From the Resource Configuration window, click the + button. Select Fast Focus from the sidebar, and select the Thorlabs Liquid Crystal Analog FastZ device from the list of devices. Click Add.
A window like shown below should appear. Below is a description of each of the configuration parameters
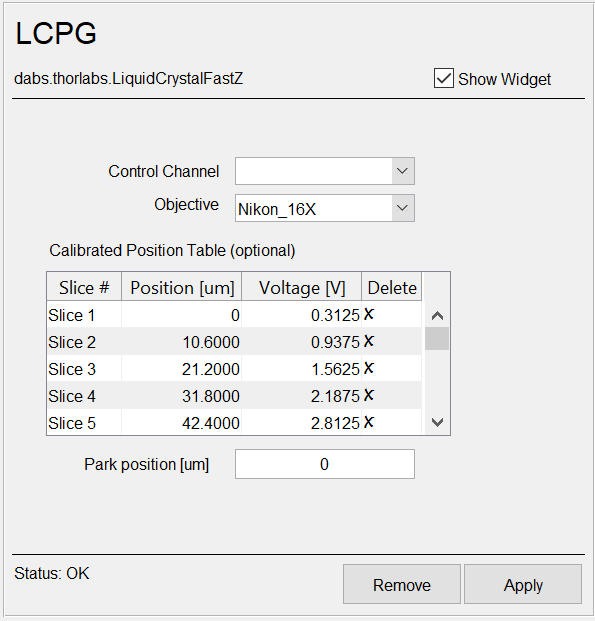
Basic Configuration
Control Channel |
Select the analog output that should be used to determine the focus depth. |
Objective |
Select the objective being used with this fastZ device. This affects the step size and range of the device, and so presets have been loaded already for the objectives that are currently supported. |
Calibrated Position Table (optional) |
The calibrated position table exposes what the expected depth and voltage should be to reliably target for each discrete plane.
|
Park Position [um] |
The position at which the device should be parked at launch of ScanImage. |
Use
Using the liquid crystal fast Z is a little different than using a piezo fastZ given the discrete nature of its locomotion.
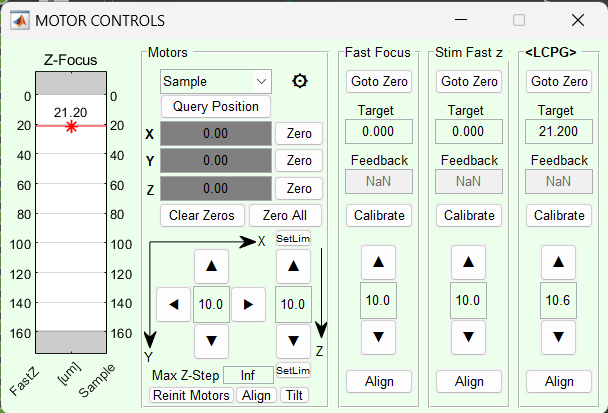
You can move it like before by incrementing or decrementing with the arrows in the FastZ section of the Motor Controls window, though the step size will be fixed based on the objective selected in the Resource Configuration window.
When defining a stack, the arbitrary stack definition should be used with the coordinate system set to Reference. This selection will allow the user to define the stack in terms of the range of the fastZ device ignoring the current sample position. When the liquid crystal fastZ is configured, the Zs that can be used will be loaded as arbitrary Zs automatically, so you only need to remove the (up to 15) planes that you do not want to acquire.
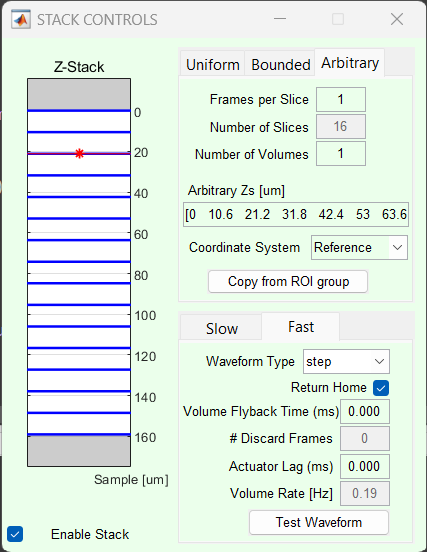
While it is possible to use other stack definitions, only the arbitrary stack definition with the coordinate system set to Reference is optimized for the liquid crystal fastZ device given the schmitt trigger like behavior at the plane transitions.
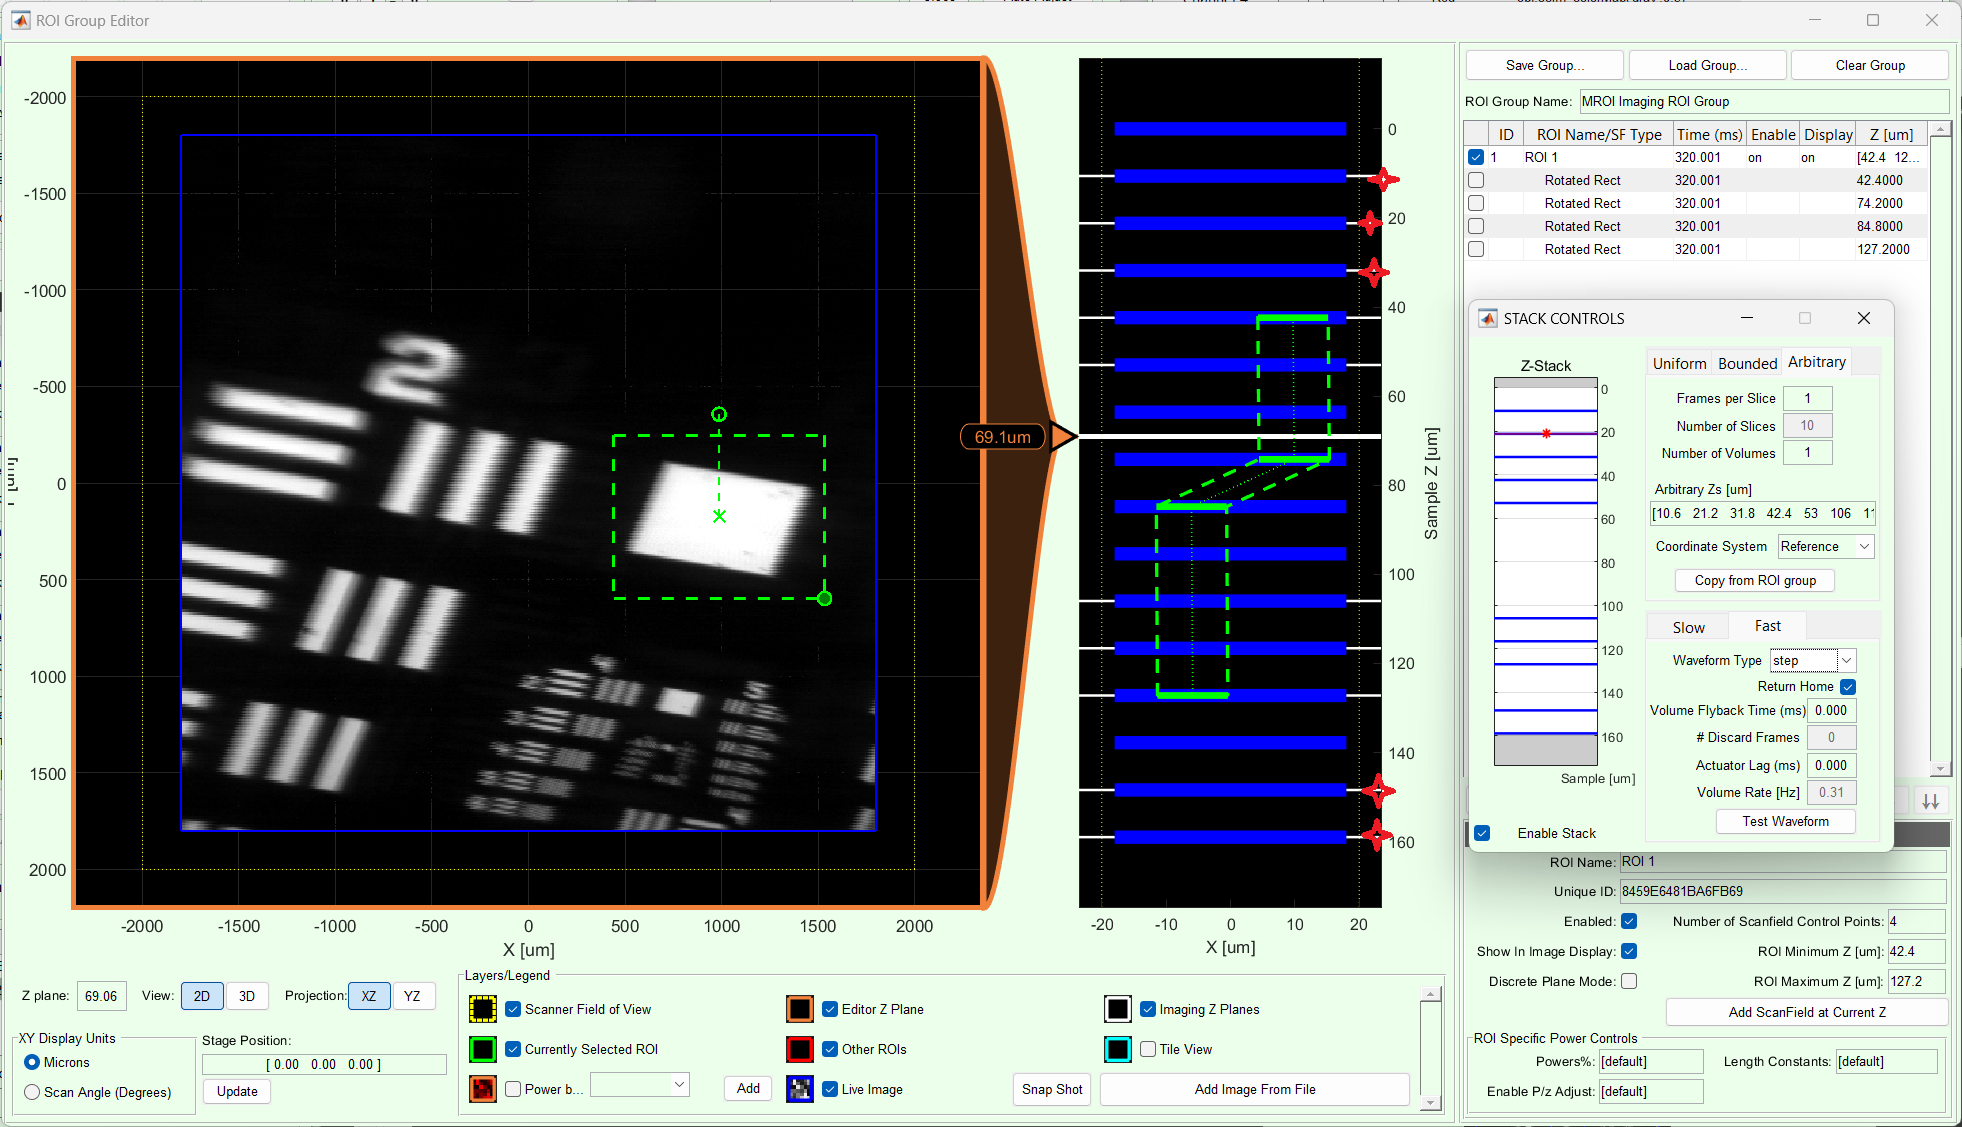
If you have ScanImage premium, this job is made easier with the ROI Group Editor. The Roi Group Editor displays the stack Zs in the profile view and white lines and also displays context image data from previously taken stacks in the main view. Then you can take a single (not necessarily logged to TIFF) stack to use as a reference to decide which planes to keep acquiring from. Then to remove a plane, simply hold shift and click on the white lines depicting the slices you wish to discard.
To get all the planes back, you can simply click the objective in the widget for the liquid crystal fastZ in the Widget Bar. You can also click apply from the resource configuration window to reload the planes. In fact, you can swap the objective while ScanImage has already been launched, and simply select the new objective from the configuration window and click apply to have the correct planes loaded.
